ⓘ Hover on the image to learn what each section does

Paralives Build Mode For Beginners

Learn how Build Mode works in Paralives, including tool categories, navigation, shortcuts, object controls, grid mode, and useful beginner building tips.

2026-06-09

Windows

Build mode toolbar Overview

To open Build Mode, click the house icon in the bottom-left corner of the screen. You can also press B on your keyboard as a shortcut.

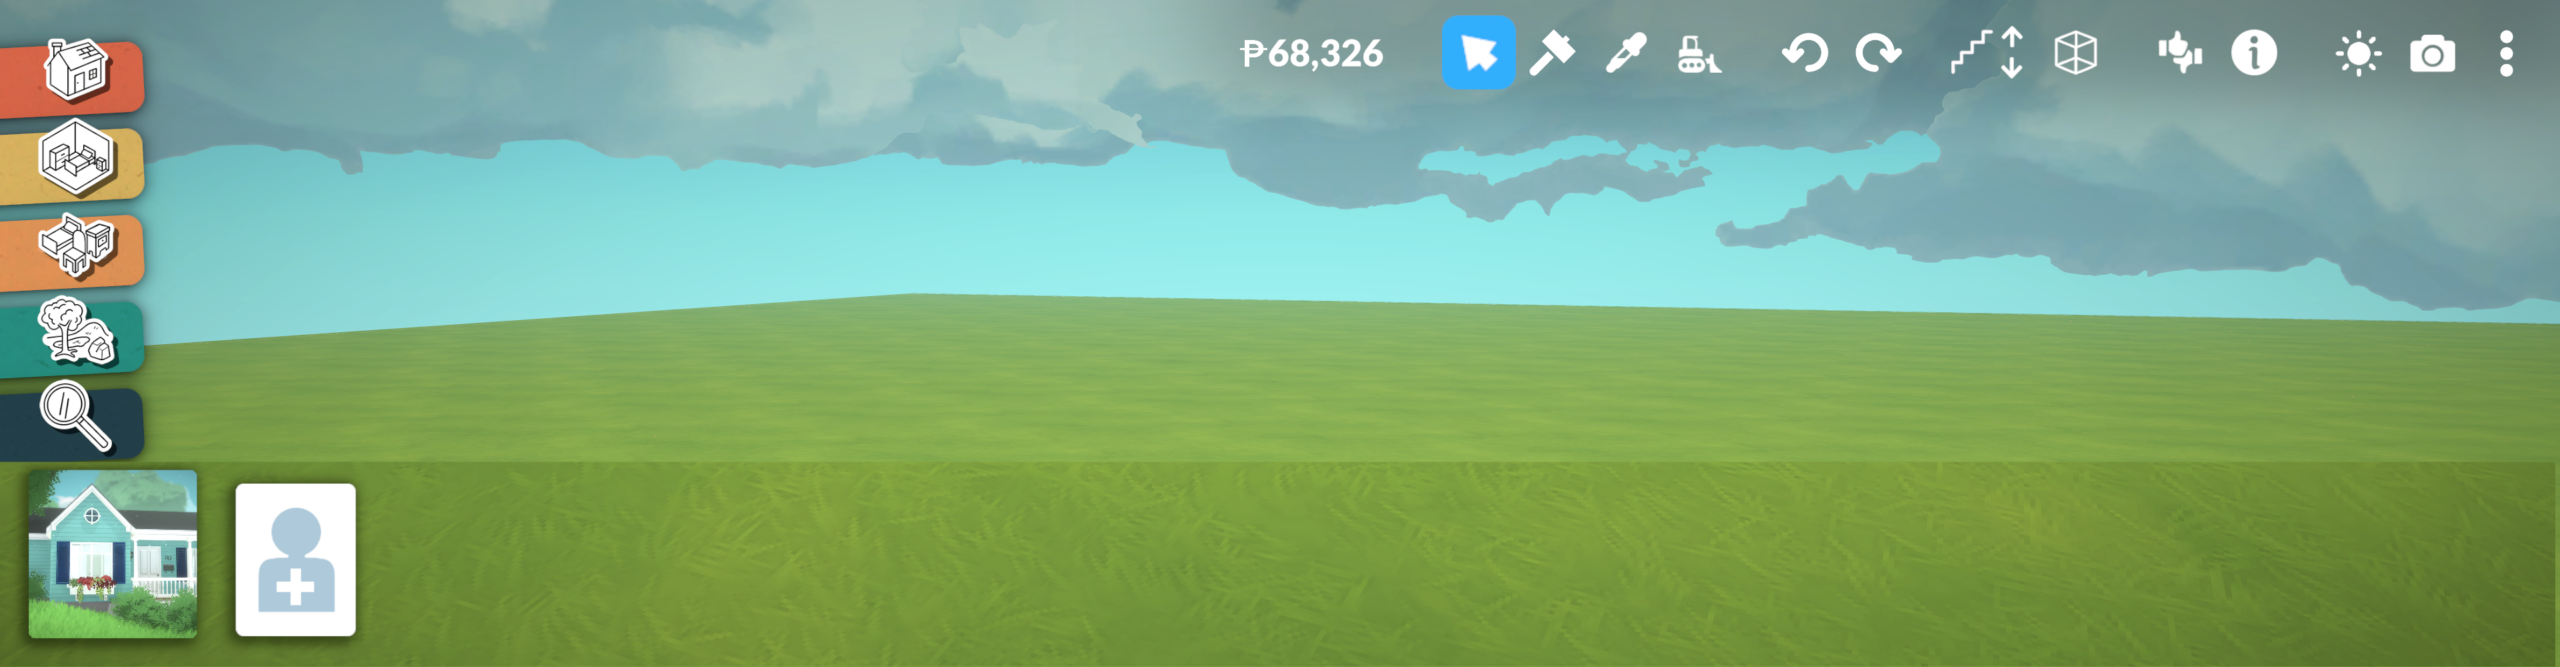
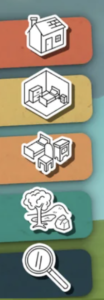
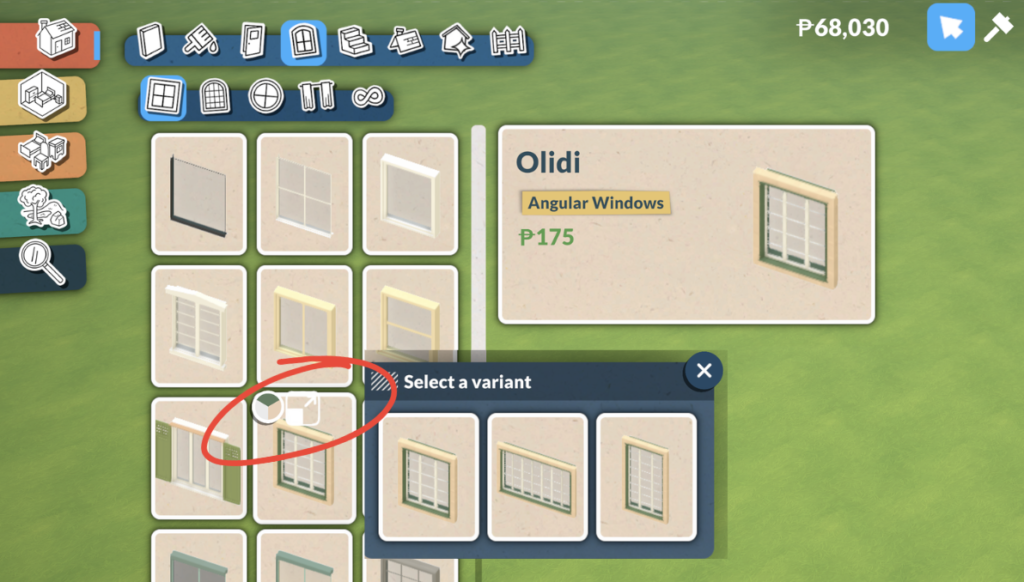
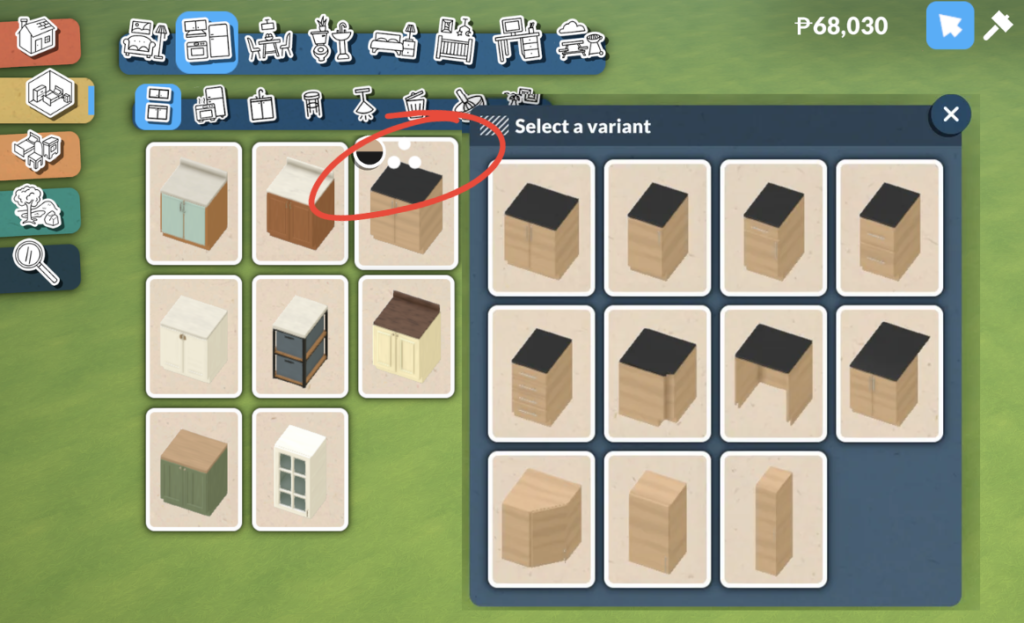
Each tab in the side menu opens its own objects, with submenus for more specific categories.

Build (B): Tools for the main structure of your build, including walls, windows, stairs, roofs, and fences.

Rooms: Browse items by room type, such as kitchen, bathroom, bedroom, or living room.

Furnishings (O): Browse items by object type, such as furniture, lighting, appliances, decor, and clutter.

Terrain Tools: Landscape and shape outdoor areas with nature items, terrain sculpting, painting, and flattening tools.

Search (Ctrl + F): Find specific items quickly without browsing every category.

Cursor Mode selects an item so you can move, resize, rotate, or edit it.

Sledgehammer (K) deletes anything highlighted in red, such as walls, furniture, or other build items.

Pipette (I) shows the selected item information and copies it so you can place another one.

Bulldoze clears everything on the lot. This cannot be undone, so use it carefully.

Undo (Ctrl + Z) reverses the last action.

Redo (Ctrl + Y) restores the last action you undid.

Levels (Page Up / Page Down) moves the view up or down between floors.

View (Home / End) changes the wall visibility mode, controlling how walls are shown on screen.

Item Variants and Alternate Versions

Some Build Mode items have extra versions you can choose from. These variants may change the item’s shape, layout, size, or related style, depending on the object.

You may find variants in two places:

In the catalog
Some item cards show small symbols or dots. Clicking these opens a variant gallery, where you can choose from related versions of that item. 

From the item menu
After placing or selecting an item, check the item toolbar at the bottom. Some objects have a pencil icon that lets you choose an alternate version of the selected item.

Changing Item Colours, Materials, and Details

Item swatches let you customise the look and details of selected objects. After selecting an item, open the swatch options to change colours, materials, or style variations. Some objects also include extra settings. For example, lights may let you adjust the light colour and brightness.

Moving, Resizing, and Rotating Items

When you select an item, Paralives may show resize controls around it. Depending on the object, you may see handles or arrows that let you adjust the item’s size horizontally, vertically, or in a specific direction.

Some items have simple resize controls, while others need the Advanced Transform Tool if you want more detailed size and position changes. You can open the Advanced Transform Tool from the item toolbar at the bottom of the screen, or press * on your keyboard to turn it on or off.

Shortcuts for Moving, Resizing, and Rotating Items

Action
Shortcut
What it does
Move item horizontally
Select an item, then click it again
Lets you move the item sideways across the lot.
Move item vertically
Hold Shift while moving an object
Lets you move the item up or down.
Resize evenly
Hold Shift while resizing
Changes the size on both sides at the same time.
Rotate 90 degrees
X
Rotates the item in 90-degree steps.
Rotate 45 degrees
, or .
Rotates the item 45 degrees counterclockwise or clockwise.
Advanced Transform Tool
*
Turns the advanced transform widget on or off.

Using the Grid for Walls and Floor Plans

When you are placing walls or fences, the grid helps you line things up and create a cleaner floor plan. You can use the grid or turn it off when you want more freedom with placement.

When grid mode is on, walls and fences follow the grid lines. Press G to turn the grid on or off.

You can also hold Shift while placing or adjusting walls and fences to use a smaller grid size. This helps you create more detailed floor plans while still keeping things lined up.

Changing the Grid Direction

If you want the grid to follow the direction of an existing wall, select the wall and choose: Start placing walls on a 1x1m grid aligned with this wall

Creating a Custom Grid Size

You can also make the grid size match the length of a wall. First, build a wall, then select that wall piece, open the three-dot menu, and choose: Start placing walls on a grid of the length of this wall

Shortcuts and Controls for Build Mode

These shortcuts help you edit items, move between floors, control the grid, and adjust objects faster in Build Mode.

Note: Some shortcuts can be changed in the game settings. Check Settings → Key Bindings if a shortcut does not work or you want to assign a different key.

Navigation

Shortcut
Action
B
Opens Build mode / wall mode
Esc
Cancels placement / leaves current mode
O
Opens the furnishings catalog
Ctrl + F
Opens catalog search
Page Up / Page Down
Moves the view up or down between floors
Home / End
Changes wall visibility
Ctrl + Z
Undo
Ctrl + Y
Redo
F5
Quick save

Selecting and Editing

Shortcut
Action
I
Hover on the item and you get the item information
I + click the item
Multiple the item
Ctrl + V
Duplicates the selected item, including changes you have made
K
Removes the selected item
Delete
Sells the selected item

Moving, Resizing, and Rotating Items

Shortcut
Action
Select item, then click it again
Moves the item horizontally
Hold Shift while moving an object
Moves the item vertically
Hold shift while resizing an object
Resizes both sides at the same time
X
Rotates the item 90 degrees
, or .
Rotates the item 45 degrees counterclockwise or clockwise.
*
Turns the Advances Transform Tool on/off

Grid and Placement

Shortcut
Action
G
Toggles the grid on or off
Hold Shift while the grid is on
Uses a smaller grid
Hold Alt while placing an item
Places the item without showing placement lines

On this page